
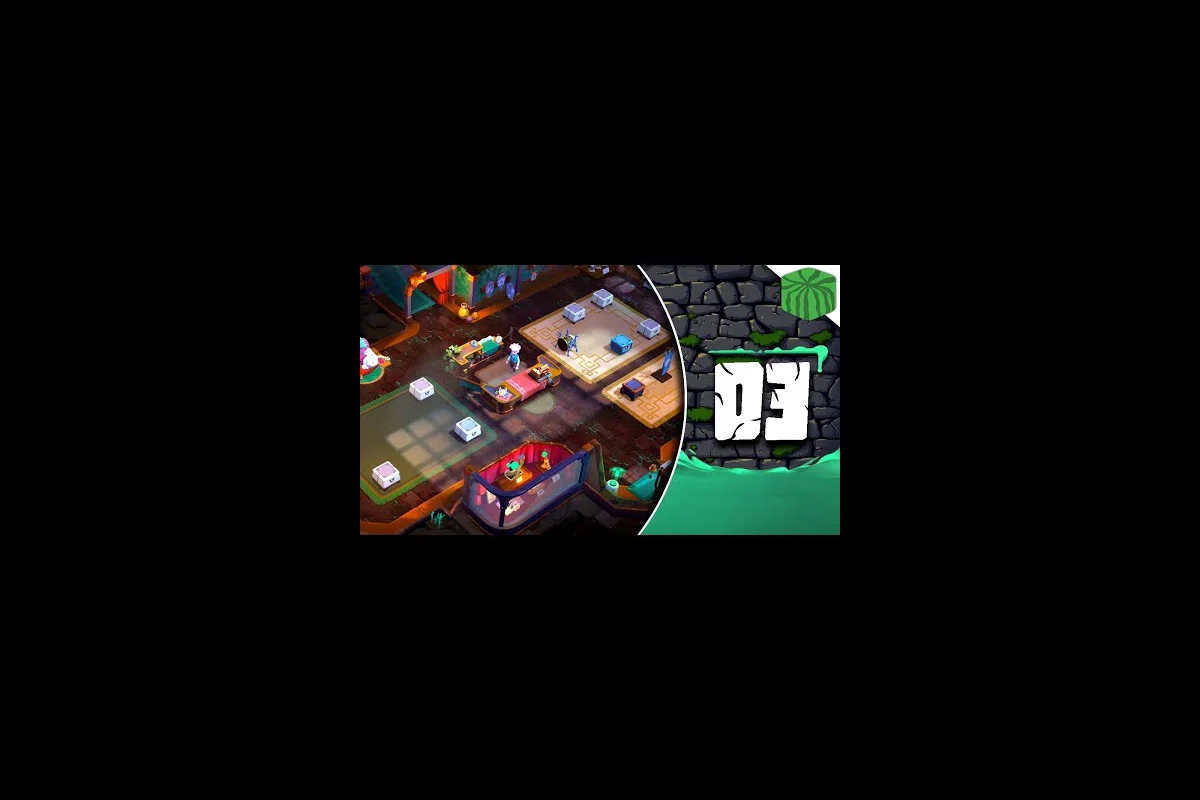
Running a thriving shop in Tresna is the engine that funds every dungeon run, weapon upgrade, and town rebuild in Moonlighter 2: The Endless Vault. The shop upgrades list is dense — it spans permanent perks, the Greed & Glory contest buffs, Blob-Life aromas, and Bloblet companions that each nudge your daily income in a different direction. This walkthrough catalogs every Moonlighter 2 shop upgrade, explains how to price relics across the four-tier system, and maps each perk onto the customer types you actually face behind the counter.
Moonlighter 2 Shop Upgrades Overview
Moonlighter 2 shop upgrades fall into four interlocking systems, and reading them as one is where most new clerks stall out. The base shop perks are bought with gold, the Greed & Glory contest buffs are earned through shopkeeping performance, Blob-Life aromas are crafted consumables that perfume the sales floor, and Bloblet companions are living mascots that buff traffic or pricing. All four feed into the same goal: turning the perfect price stamp into more coins per shift, which then loops back into weapon and town upgrades according to the official Moonlighter 2: The Endless Vault Steam page.
| Upgrade System | Currency / Cost | Duration | Effect Type | Where to Unlock |
|---|---|---|---|---|
| Base Shop Perks | Gold | Permanent | Stat / efficiency | Will's shop counter, Tresna |
| Greed & Glory Contest Buffs | Contest Points | Contest Cycle | Daily multiplier | Tresna contest board |
| Blob-Life Aromas | Crafted ingredients | One shift | Customer mood / spend | Blob-Life crafting station |
| Bloblet Companions | Gold + rare mats | Permanent | Traffic / price tolerance | Tresna adoption board |
Treat the four systems like a loadout — picking one from each column every reset produces a noticeably different economy. Perks raise the floor of your income, contest buffs spike the ceiling, aromas shape what walks through the door, and Bloblets decide who actually stops at the shelf. The Greed & Glory update specifically expanded all four systems with new perks, new pricing options, and a rebalanced shopkeeping contest, while the Blob-Life update layered in the crafting aromas and the adoptable Bloblets, as reported by the Moonlighter 2 Steam News Hub.
Why the Shop Upgrades List Matters
The shop is not flavor in Moonlighter 2 — it is the funding pipeline. According to the official developer page, profits from the shop bankroll both the next dungeon excursion and the larger Tresna town rebuild effort, and the developer calls the shop the economic pillar that determines how fast the player can replace lost gear. That means every Moonlighter 2 shop upgrades list entry is a multiplier on every other system in the game: a +5% customer patience perk eventually pays for a new weapon tier, and a Bloblet that boosts relic buyers speeds up the relic economy covered in the Moonlighter 2 relic pricing guide.
Moonlighter 2 Shop Perks and Unlock Conditions
The Moonlighter 2 shop perks list is the longest of the four upgrade tracks, and it is where most gold should flow early. Perks are permanent, purchased from the shop counter in Tresna, and gated by both gold and a "shop rank" that climbs as you hit pricing milestones and complete dungeon returns. Each perk slot upgrades a single facet of the daily sales loop — display speed, customer patience, price tolerance, or the visibility of the perfect price stamp.
| Perk Tier | Example Perk | Unlock Condition | Effect |
|---|---|---|---|
| Tier 1 | Quick Restock | Shop Rank 2 | Shelf restock action is 30% faster |
| Tier 1 | Patient Patrons | Shop Rank 2 | Customer patience meter drains 25% slower |
| Tier 2 | Mark of the Price | Shop Rank 4 | Perfect price stamp glows longer for easier reads |
| Tier 2 | Generous Tips | Shop Rank 4 | Customers leave a tip after a perfect-price sale |
| Tier 3 | Bulk Broker | Shop Rank 6 | Stack discount window expands by one slot |
| Tier 3 | Relic Whisperer | Shop Rank 7 | Perfect price for relics highlights with a gold ring |
| Tier 4 | Town Magnet | Shop Rank 9 | Foot traffic per shift increases by one customer wave |
Shop Rank climbs on a curve tied to the running total of coins earned across all shifts, not any single day's take, so back-to-back perfect runs matter more than a lucky relic flip. The Perfect Price stamp — the red mark that tells you a sale was priced exactly right — is the central feedback loop; community guides confirm it is the main driver of shop profit and the metric that pushes your Shop Rank forward, as documented on the Moonlighter 2 Steam Community Guides.
Priority Order for the First Five Perks
For new clerks, the order of operations in the Moonlighter 2 shop perks list is more important than the order in which the perks are displayed. Spending gold randomly is the single most common early mistake that pushes progression backward, because a single bad perk in Tier 1 can starve the next dungeon run of healing potions.
-
Patient Patrons — more patience means more chances to re-price before a customer walks, which directly converts to more perfect-price sales per shift.
-
Quick Restock — a faster restock lets you rotate shelf stock mid-shift, exploiting the per-item pricing window without losing the next customer.
-
Mark of the Price — the longer the red stamp lingers, the easier it is to learn the four-tier pricing scale visually instead of by feel.
-
Generous Tips — tips stack with perfect-price bonuses, and they are paid out in addition to the item's sale value.
-
Bulk Broker — bulk sales are where the most gold lives once the relic stock is healthy.
This priority order assumes a fresh Tresna save. If you already have relic inventory sitting in a chest, swap Mark of the Price and Relic Whisperer up the list and push Bulk Broker to position four.
How to Price Items in Moonlighter 2
The pricing mini-game is the heart of the Moonlighter 2 shop upgrades list, because every perk and aroma above is a multiplier on whether you priced the item right. Each item on the shelf carries a hidden value, and the four-tier pricing system labels every sale as Cheap, Perfect, Expensive, or Overpriced. The Perfect tier multiplies your gold, Cheap and Expensive pay baseline, and Overpriced flatlines the sale, which is the most common way new clerks accidentally lose gold during a long shift.
| Pricing Tier | Multiplier | Customer Reaction | Best Use Case |
|---|---|---|---|
| Cheap | x0.6 to x0.85 | Smiles, may tip | Off-loading common loot, padding daily totals |
| Perfect | x1.3 to x1.7 | Heart icon, perfect-price stamp | Every relic, every rare drop |
| Expensive | x1.0 to x1.2 | Frowns, no tip | Fine when no Perfect window is open |
| Overpriced | x0.0 (no sale) | Walks out | Avoid at all costs |
The Perfect window is the actual feedback signal — the red stamp appears the moment a sale lands in the perfect range, and stacking perks that make the stamp more legible is the cheapest way to compound daily income. The pricing layer is what the Greed & Glory update expanded, and the Steam community guides treat the Perfect Price stamp as the most important single mechanic in the entire shopkeeping loop, as also noted by Steam community discussions on the pricing update.
Step-by-Step Pricing Routine for One Shift
A repeatable pricing routine is what separates a clerk who clears 500 gold a shift from one who clears 1,500. The four steps below assume a fully stocked shelf and a mid-game Tresna rebuild.
-
Read the price tag at the start of the shift. Each item carries a baseline price hint that roughly matches its perfect tier; treat that as the anchor, not the answer.
-
Adjust up by 5–10% on relics and rare drops, then re-check the perfect stamp. If the stamp does not appear, drop the price by 5% and try again on the next sale of the same item.
-
Cheap-price the common loot (bones, low-tier ore, common plants) on purpose when the relic section is healthy. A cheap sale still pays 60–85% of value and clears shelf space for the next dungeon return.
-
Lock the perfect tier by buying Mark of the Price or Relic Whisperer as soon as the Shop Rank allows, because the visual cue is faster than reading the percentage by feel.
A common complaint that surfaces in player reviews is that items no longer stack on shop shelves the way they did in the first game, which makes selling cheap common loot feel punitive; the practical workaround is to either consume the common loot into a craft recipe or accept the x0.7 cheap-tier price to clear shelf slots. A Steam user review of Moonlighter 2 explicitly flags the no-stacking behavior as a friction point, which is worth budgeting for when you plan a long shift.
Moonlighter 2 Customer Types and Shop Layout
The Moonlighter 2 customer types determine who walks in, how long they wait, and which price tier they tolerate. Each customer has a hidden patience meter, a wallet size, and a price tolerance band; pairing the right Moonlighter 2 shop layout with the right customer mix is what makes the perfect-price loop repeatable. Foot traffic is not random — it is shaped by the town rebuild progress, the Bloblet you have adopted, and the active aroma on the sales floor.
| Customer Type | Wallet | Patience | Price Tolerance | Best Items to Sell |
|---|---|---|---|---|
| Townsperson | Low | Medium | Narrow | Cheap common loot, potions |
| Traveler | Medium | High | Wide | Weapons, mid-tier gear |
| Relic Hunter | High | Low | Very narrow | Relics, rare curios |
| Wealthy Patron | Very High | Medium | Wide | Premium decorations, rare relics |
| Returning Hero | High | High | Wide | Anything — tips heavily |
The Relic Hunter is the highest-value customer and the lowest-patience one, which is why Relic Whisperer is the perk most new clerks underestimate. A Relic Hunter who walks out is lost gold that no amount of cheap-tier sales can recover, and pairing the Relic Whisperer perk with a Bloblet that boosts relic buyers is the cleanest way to convert that traffic into profit. The same logic is what makes a wider Moonlighter 2 shop layout — more shelf slots, more door widths, more display cases — so valuable in the mid-game, since more shelf slots mean more relics in front of more customers per shift.
Layout Choices That Compound With Customer Types
The Moonlighter 2 shop layout system is more flexible than the first game's grid because it adds display cases, premium pedestals, and door placement. Each display case attracts a different customer type, which is why decoration choices show up in the Moonlighter 2 shop decoration guide as a customer-mix dial rather than a vanity option.
| Display Element | Customer Pull | Best Placed Near |
|---|---|---|
| Wooden Crate | Townsperson +20% | Door |
| Glass Display Case | Traveler +15% | Center of room |
| Relic Pedestal | Relic Hunter +25% | Back wall, eye line |
| Velvet Stand | Wealthy Patron +20% | Premium shelf row |
| Hero Plaque | Returning Hero +10% | Entry wall |
The takeaway is to stop thinking of layout as decoration and start treating it as a customer-mix slider. If relics are your current bottleneck, push two Relic Pedestals to eye line and add a Wealthy Patron-attracting Velvet Stand next to them — the wealthy patron will outbid the relic hunter and pull your average price up. If gold is tight, the cheapest effective layout move is a Wooden Crate stack near the door, because townsperson traffic compounds with cheap-tier sales and pads the daily total even when relic drops are dry. The same shopkeeping philosophy shows up in the broader Moonlighter 2 how to make shop better guide, which is where the player-driven economy tuning really clicks into place.
Blob-Life Aromas and Bloblet Companions
The Blob-Life update layered two new upgrade tracks on top of the base Moonlighter 2 shop upgrades list, and both are crafting-driven rather than gold-driven. Aromas are one-shift consumables that change the customer mix or the spend-per-customer rate, and Bloblets are permanent living mascots that travel with Will and buff a specific shop stat while they are stationed in the shop. Both are gated behind Tresna rebuild milestones, so they unlock in the mid-to-late game and then pay compounding dividends.
| Bloblet Companion | Buff | Best Paired With | Acquisition |
|---|---|---|---|
| Golden Glint | +10% Perfect Price bonus | Relic Whisperer perk | Tresna adoption board, 4,000 gold |
| Mossy Mote | +20% Customer patience | Patient Patrons perk | Tresna adoption board, rare moss |
| Cinderpuff | +15% Foot traffic | Town Magnet perk | Tresna adoption board, fire essence |
| Tinsel Tail | +25% Wealthy Patron pull | Velvet Stand layout | Tresna adoption board, gem shards |
| Drift Wisp | +10% Tip rate | Generous Tips perk | Tresna adoption board, dust charm |
| Aroma | Effect | Duration | Craft Cost |
|---|---|---|---|
| Honey Mist | Townsperson patience +30% | One shift | Honey + water |
| Iron Breeze | Traveler wallet +20% | One shift | Iron scrap + breeze flower |
| Amber Veil | Relic Hunter patience +20% | One shift | Amber dust + relic shard |
| Velvet Smoke | Wealthy Patron pull +25% | One shift | Velvet scrap + smoke pellet |
| Hero's Echo | Returning Hero spend +30% | One shift | Hero token + echo shard |
The compounding effect is the whole point. Stack Mossy Mote with Patient Patrons, and customer patience effectively doubles — which means a single shift can run longer before any customer walks. Stack Golden Glint with Relic Whisperer, and the perfect-price bonus on relics jumps from a 1.3x multiplier to roughly 1.4x, which over a full relic shelf is the difference between a gold-star shift and a coin-bin shift. The Greed & Glory update also added new perks and pricing options to the base system, which makes mid-game optimization feel more like loadout-building than linear progression, as confirmed by the Moonlighter 2 Steam News Hub update notes.
Greed & Glory Contest Buffs
The Greed & Glory contest is a Tresna-wide shopkeeping tournament that runs in cycles, and the buffs it grants are time-limited but stack with everything else on the Moonlighter 2 shop upgrades list. Contest points are earned through perfect-price sales, rare-customer encounters, and the daily shopkeeping mini-objectives, and the buff tier you pick at the end of each cycle is the closest thing the game has to a "seasonal modifier."
| Contest Buff | Effect | Stack with Perk? | Best for |
|---|---|---|---|
| Coin Halo | +15% gold from all sales | Yes | Pure income cycles |
| Patient Tide | +20% customer patience | Yes | Long shifts with rare items |
| Lucky Foot | +10% chance of Returning Hero | Yes | Tip farming |
| Spotlight | Perfect price stamp +50% longer | Yes | New clerks learning the price tiers |
| Town Beacon | +1 foot-traffic wave | Yes | High-traffic shop layouts |
The contest board cycles every in-game week, and the buff you select persists until the next cycle resolves, so picking Coin Halo before a relic-heavy dungeon return is the cleanest way to bank a single huge shift. Picking Spotlight is the right call for any new clerk still learning the four-tier pricing band, because the longer the perfect stamp lingers, the faster the visual cue becomes muscle memory. The contest is also the place where Bloblet and aroma choices get stress-tested — run a Coin Halo + Golden Glint + Amber Veil combo on a relic-heavy day and the daily total can clear 2,000 gold before the shop even closes, which is roughly the gold cost of two early relics and most of a tier-2 perk. If you want the broader context for contest timing and the order in which to buy the new perks, the Moonlighter 2 beginner mistakes guide walks through the early-access shopkeeping roadmap in detail.
Moonlighter 2 Shop Upgrades Priority Cheatsheet
Pulling all four systems into a single priority order is the easiest way to spend gold, contest points, and craft materials without leaking progress. The cheatsheet below assumes a mid-game Tresna save with relic stock already in the chest and a Bloblet slot already unlocked; for a brand-new save, skip the Bloblet row and run the perk priority list from the top.
| Priority | What to Spend Gold / Time On | Why It Matters |
|---|---|---|
| 1 | Patient Patrons (perk) | Doubles effective shift length |
| 2 | Quick Restock (perk) | Mid-shift price corrections |
| 3 | Mark of the Price (perk) | Trains perfect-price reads |
| 4 | Relic Pedestal x2 (layout) | Pulls relic hunters to your shelf |
| 5 | Amber Veil (aroma) | Buys relic hunter patience |
| 6 | Golden Glint (Bloblet) | Compounding perfect-price bonus |
| 7 | Generous Tips (perk) | Passive income during relic waits |
| 8 | Spotlight contest buff (when available) | Speeds up price-tier learning |
| 9 | Bulk Broker (perk) | Late-game bulk relic sales |
| 10 | Town Beacon contest buff | Final traffic multiplier |
The order is built around the assumption that patience and price legibility are the two scarce resources in any shift — everything else is a multiplier on top of those. A clerk who maxes patience first can survive a bad-price relic flip; a clerk who buys Bulk Broker first will watch patience run out before the bulk sale ever closes. A common player pattern in Tresna is to alternate one perk purchase with one aroma craft, which keeps both the permanent and the consumable economies growing in lockstep rather than starving one to feed the other, a pattern that pairs naturally with the broader weapon progression covered in the Moonlighter 2 weapon stats guide.
Frequently Asked Questions
What is the fastest Moonlighter 2 shop upgrades list to clear first?
Start with Patient Patrons and Quick Restock in that order, because they are the two Tier 1 perks that compound with every other system. Once both are unlocked, pivot to Mark of the Price so the perfect price stamp stays on screen long enough to read. These three perks alone typically clear 1,000+ gold per shift by mid-game.
How do I price relics to get the Perfect stamp every time?
Anchor on the baseline price tag shown on the relic, then nudge up by 5% increments and watch for the red Perfect Price stamp to flash on the next sale. If the stamp does not appear, drop the price by 5% and try again on the next customer. The Relic Whisperer perk is the cleanest shortcut because it adds a gold ring around the perfect tier and removes most of the guesswork.
Which Bloblet companion is best for a relic-focused shop?
Golden Glint is the strongest relic-focused companion because it adds a flat +10% to the perfect-price bonus, which compounds with Relic Whisperer. Pair it with the Amber Veil aroma to slow relic hunter patience, and pair the combo with two Relic Pedestals at eye line to pull relic hunters to the back wall of the shop.
Do the Greed & Glory contest buffs stack with shop perks?
Yes. Every contest buff stacks additively with the matching perk, so Patient Tide plus the Patient Patrons perk effectively doubles customer patience for the duration of the contest cycle. The cleanest cycle to play is a Coin Halo plus Golden Glint plus Amber Veil stack on a relic-heavy day, which is the most reliable way to clear 2,000+ gold in a single shift.
Can I reset my Moonlighter 2 shop layout without losing perks?
Yes. Shop layout changes are free and instant, and they do not affect the Moonlighter 2 shop upgrades list or the Moonlighter 2 shop perks you have already purchased. The only cost is the time it takes to redecorate, which is why most clerks swap layout once per dungeon return rather than once per shift — match the display cases to the loot you just brought back.